Deploying Zilla Plus via AWS AMI
Deploying Zilla Plus via AWS AMI
Overview
The Zilla Plus is an enterprise-ready, Kafka-native edge, and service proxy. It is a flexible, secure, and reliable way of creating stateless, multi-protocol API entry points into your Kafka cluster for both native and non-native Kafka clients.
This Guide will walk you through deploying Zilla Plus service using AWS AMI.
Subscribe via AWS Marketplace
To launch a Zilla Plus instance, a subscription to the Zilla Plus product on Amazon Marketplace is required.
- To get started, visit the AWS Marketplace Product Page
Subscribeto the appropriate Zilla Plus edition:- You should see
Zilla Pluslisted in your AWS Marketplace subscriptions.
You can skip this step if you have already subscribed to Zilla Plus via AWS Marketplace.
Launch Zilla Plus Instance via AMI
Prerequisites
- A Subscription to the Zilla Plus product on Amazon Marketplace
Steps to launch a Zilla Plus instance
Sign in to the AWS Console
- Navigate to the EC2 Dashboard in your preferred region.
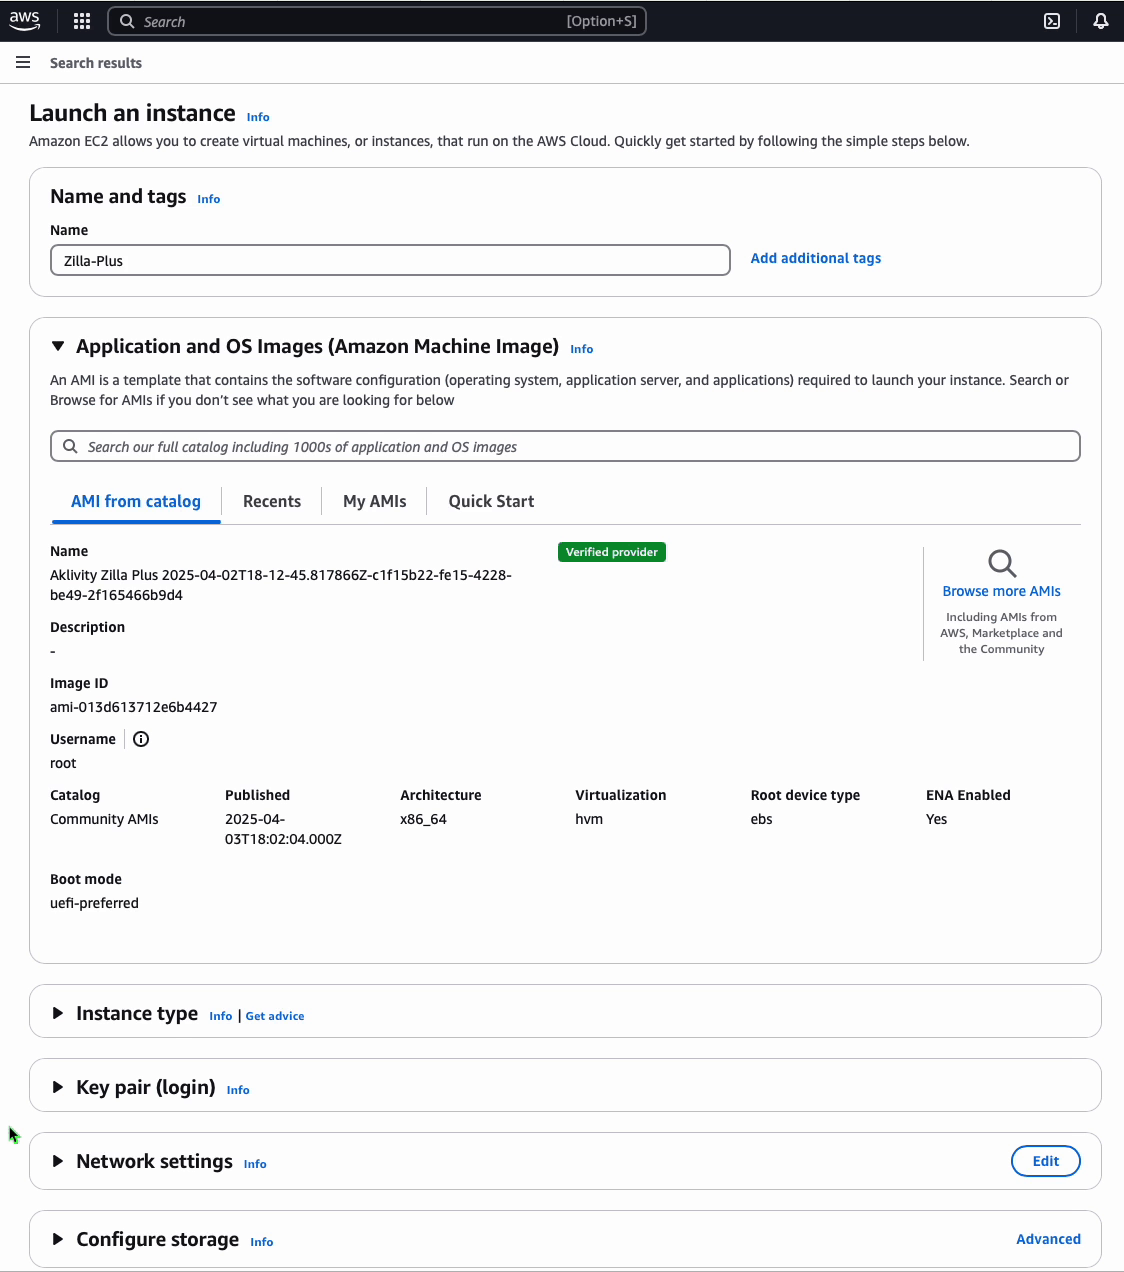
Start a New Instance
- Click
Launch Instanceand provide a name (e.g.,zilla-plus-proxy).
- Click
Select the Zilla Plus AMI
- Choose the subscribed Zilla Plus AMI from your list.
Choose an Instance Type
- Select an instance type that fits your workload (e.g.,
t3.mediumorlarger).
- Select an instance type that fits your workload (e.g.,
Configure Networking
- Create or select a
VPC security groupthat allows access to the required ports for Zilla Plus. - Ensure the instance is launched in a subnet with Auto-assign public IP enabled.
- Create or select a
Add User Data
- Expand
Advanced details>User data - optional - Paste custom cloud-init script to initialize the Zilla Plus service with
zilla.yamlconfiguration. - You can also use
base64-encodedinput directly by selectingUser data has already been base64 encodedoption.
- Expand
Launch the Instance
- Click
Launch Instance.
- Click
User Data
runcmd:
  - systemctl enable amazon-ssm-agent
  - systemctl start amazon-ssm-agent
  - systemctl enable zilla-plus
- systemctl start zilla-pluscontent: |
name: public
vaults:
secure:
type: aws-secrets
bindings:
tcp_server:
type: tcp
kind: server
options:
host: 0.0.0.0
port: {{ EXTERNAL_PORT }}
exit: tls_server
tls_server:
type: tls
kind: server
vault: secure
options:
keys:
- {{ EXTERNAL_KEY }}
routes:
- exit: kafka_proxy
when:
- authority: "{{ EXTERNAL_AUTHORITY }}"
kafka_proxy:
type: kafka-proxy
kind: proxy
options:
external:
host: "{{ EXTERNAL_HOST }}"
port: {{ EXTERNAL_PORT }}
internal:
host: "{{ INTERNAL_HOST }}"
port: {{ INTERNAL_PORT }}
exit: tls_client
tls_client:
type: tls
kind: client
vault: secure
options:
trustcacerts: true
exit: tcp_client
tcp_client:
type: tcp
kind: client
options:
host: "*"
port: {{ INTERNAL_PORT }}
routes:
- when:
- authority: "{{ INTERNAL_AUTHORITY }}"
telemetry:
exporters:
logs:
type: stdoutComplete User Data for reference
#cloud-config
write_files:
- path: /etc/zilla/zilla.yaml
#region config_init
content: |
  name: public
  vaults:
    secure:
      type: aws-secrets
  bindings:
    tcp_server:
      type: tcp
      kind: server
      options:
        host: 0.0.0.0
        port: {{ EXTERNAL_PORT }}
      exit: tls_server
    tls_server:
      type: tls
      kind: server
      vault: secure
      options:
        keys:
        - {{ EXTERNAL_KEY }}
      routes:
      - exit: kafka_proxy
        when:
        - authority: "{{ EXTERNAL_AUTHORITY }}"
    kafka_proxy:
      type: kafka-proxy
      kind: proxy
      options:
        external:
          host: "{{ EXTERNAL_HOST }}"
          port: {{ EXTERNAL_PORT }}
        internal:
          host: "{{ INTERNAL_HOST }}"
          port: {{ INTERNAL_PORT }}
      exit: tls_client
    tls_client:
      type: tls
      kind: client
      vault: secure
      options:
        trustcacerts: true
      exit: tcp_client
    tcp_client:
      type: tcp
      kind: client
      options:
        host: "*"
        port: {{ INTERNAL_PORT }}
      routes:
      - when:
        - authority: "{{ INTERNAL_AUTHORITY }}"
  telemetry:
    exporters:
      logs:
        type: stdout
#endregion config_init
#region services_init
runcmd:
- systemctl enable amazon-ssm-agent
- systemctl start amazon-ssm-agent
- systemctl enable zilla-plus
- systemctl start zilla-plus
#endregion services_initVerify Zilla Plus Service
This checks that the services and networking were properly configured.
Navigate to the EC2 running instances dashboard.
Check your selected region
Make sure you have selected the desired region, ex: US East (N. Virginia) us-east-1.
Select the Zilla Plus instance launched to show the details.
Find the Public IPv4 Address and then SSH into the instance.
ssh -i ~/.ssh/<key-pair.cer> ec2-user@<instance-public-ip-address>After logging in via SSH, check the status of the zilla-plus system service.
Verify that the zilla-plus service is active and logging output similar to that shown below.
systemctl status zilla-plus.servicezilla-plus.service - Zilla Plus
Loaded: loaded (/etc/systemd/system/zilla-plus.service; enabled; vendor preset: disabled)
Active: active (running) since...You can get an stdout dump of the zilla-plus.service using journalctl.
journalctl -e -u zilla-plus.service | tee -a /tmp/zilla.logsystemd[1]: Started zilla-plus.service - Zilla Plus.
...All output from cloud-init is captured by default to /var/log/cloud-init-output.log. There shouldn't be any errors in this log.
cat /var/log/cloud-init-output.logCloud-init v. 22.2.2 running 'init'...Conclusion
You have successfully deployed the Zilla Plus using AWS AMI.
Tips
Check out the Troubleshooting guide if you run into any issues.